"Red" Starter Pack for Commerce
Welcome to the first official Starter Pack for Commerce. In "Red" you'll find ready-to-use templates, chunks, and package integrations to power a traditional webshop with Commerce.
We call this a Starter Pack and not a Theme, because we want you to customise it and make it fit your clients' needs. The design is simple and modern, but also a little bland awaiting your artistic influence to really make it pop.
Starter Pack "Red" is free to use, and a great resource for your first Commerce shop or just an extra quick build. It's based on Bootstrap 4, covering a variety of useful building blocks to take advantage of.
Let's take a look! (Or, visit a live preview here)


AJAX enhanced out of the box
The starter pack automatically uses AJAX throughout. From the add to cart to the checkout, Commerce interactions are all handled in the browser with a simple, but slick, loading animation.
The mini cart in the header is one of our favourite parts; it automatically opens and lets the customer see their order at a glance at any time. The customer can also choose to view the detailed cart first, or to skip directly to entering their information to place the order.
Templates & Features
The following templates/resources are included in the package:
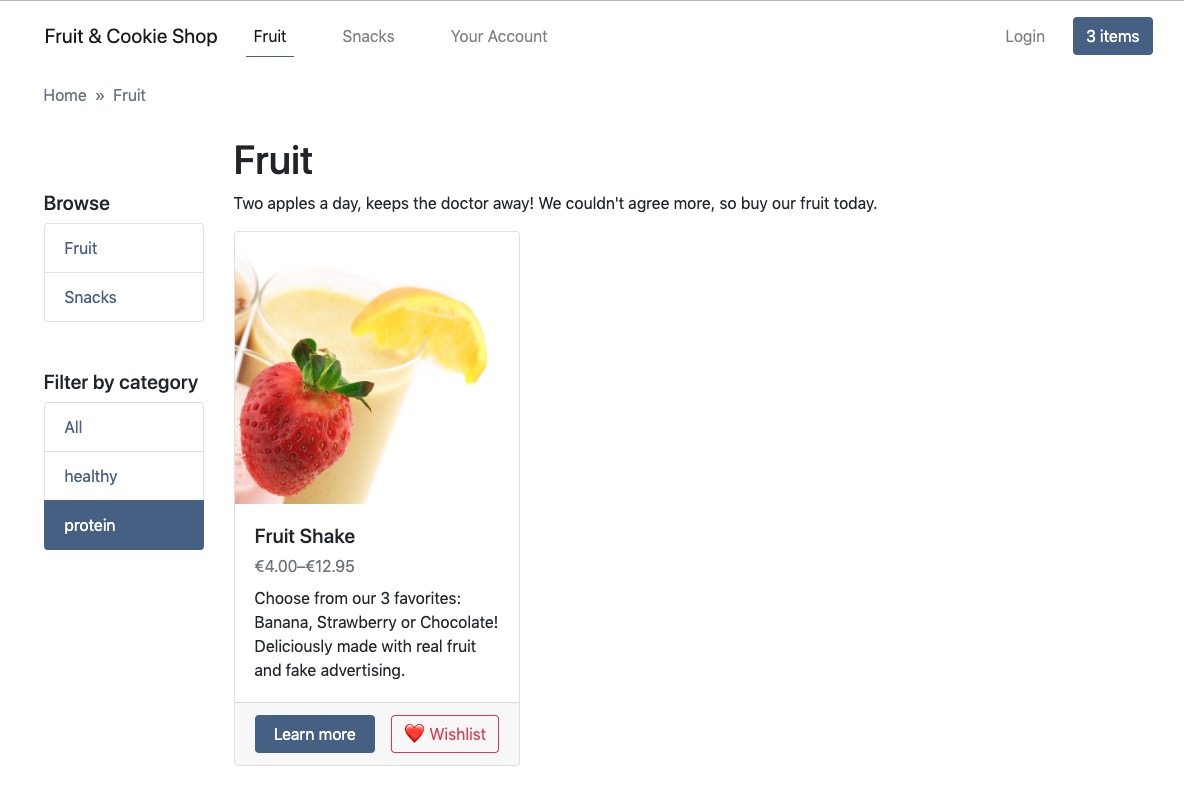
- Homepage with a hero image, featured product listing, category listing, simple header
- Simple categories overview with:
- Links to your other categories
- Simple filtering powered by Tagger (single group)
- Photos, price ranges, and per product, and short description per product
- Pagination support (pdoPage)
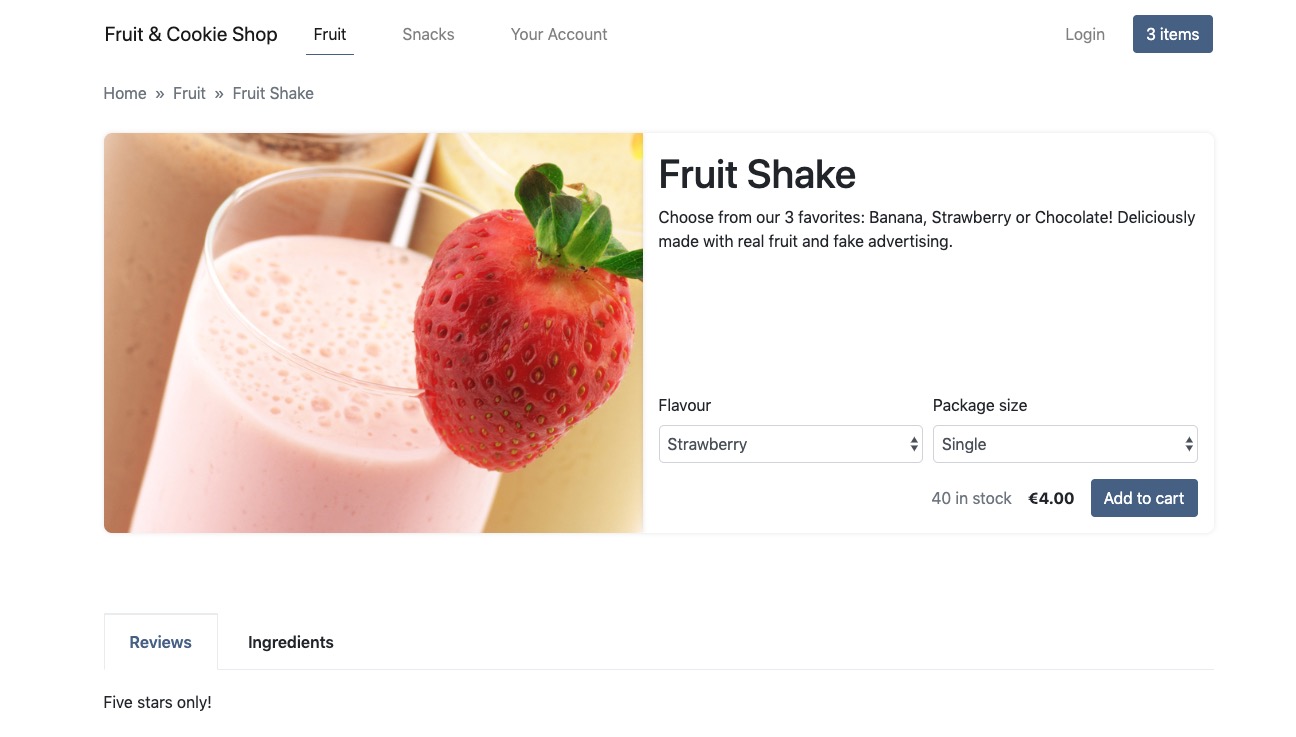
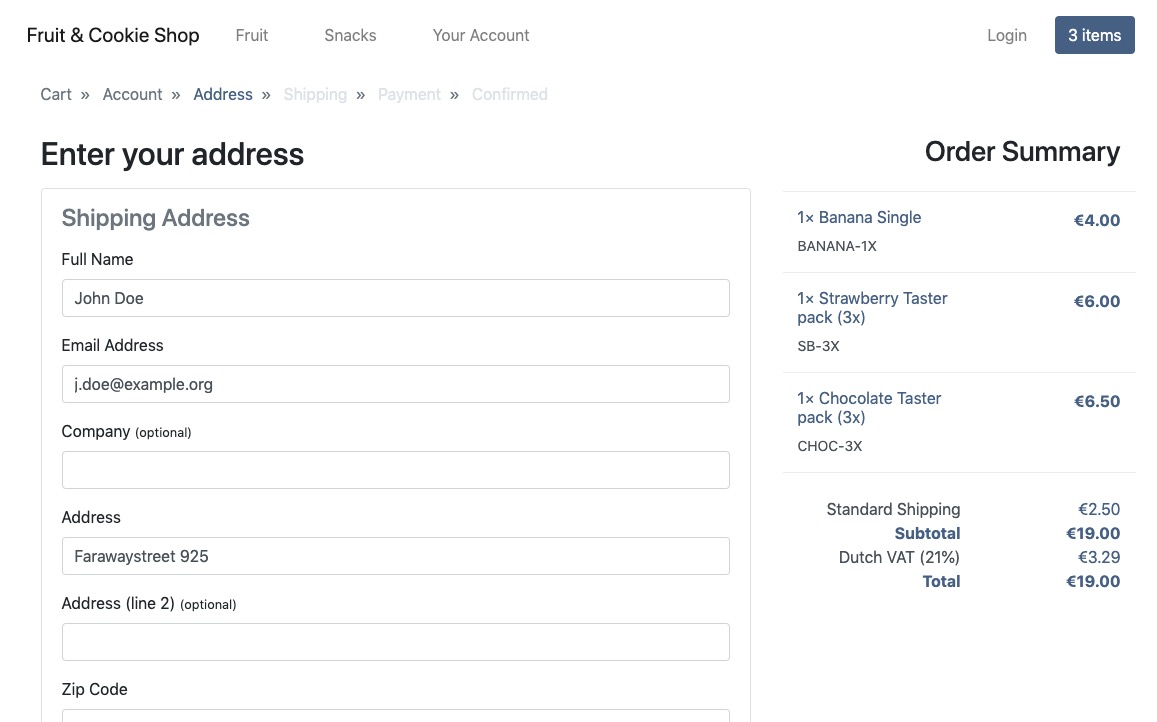
- Simple product page with:
- Dependent select boxes for the product variety selection based on the Product Matrix, with dynamic rendering of available stock and variety price
- AJAX-enhanced add to cart button
- CSS-only tabs for additional content, filled by TVs on a per-resource basis, to hold anything from reviews or ingredients to more specifications.
- Automatic list of related products based on the resource tags using Tagger
- Automatic list of related products based on resource information using getRelated.
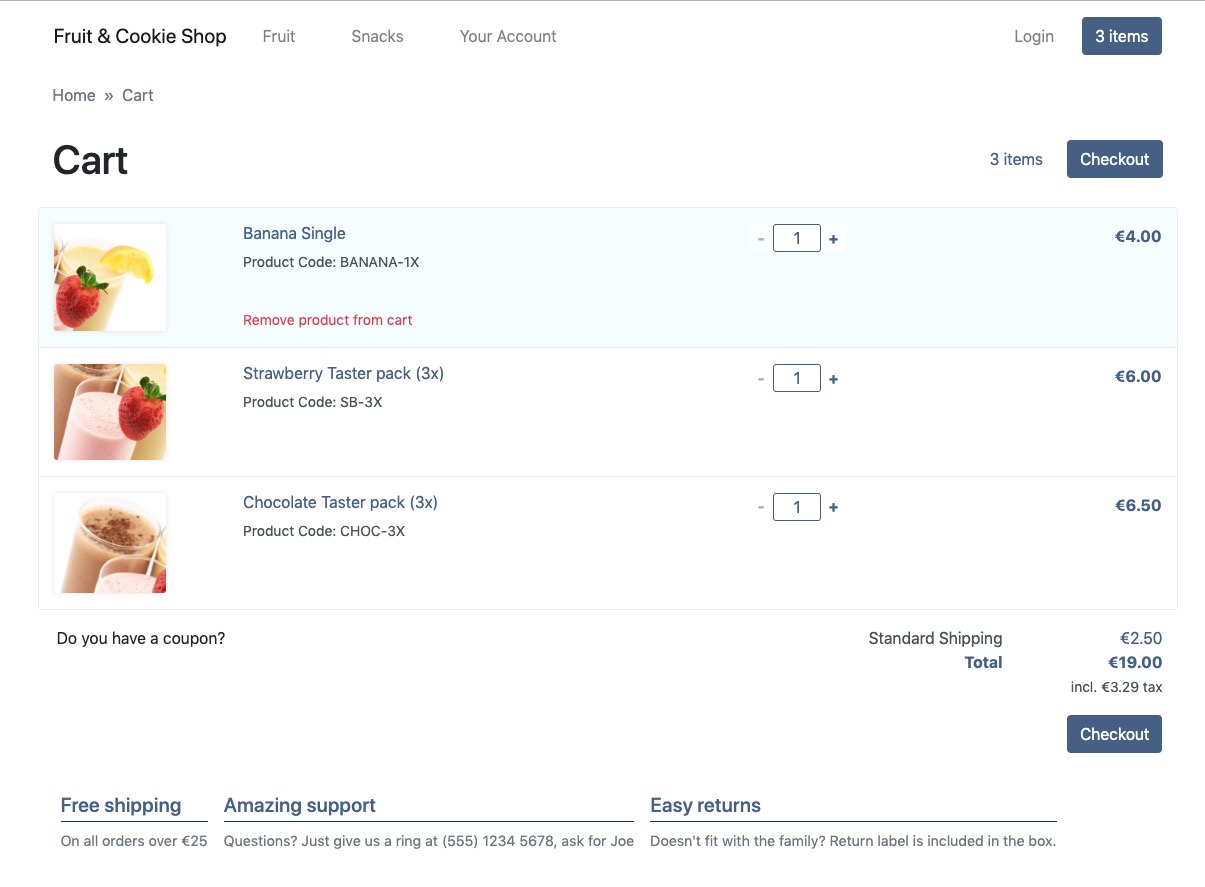
- Mini-cart in the header, showing individual items, shipping costs, and total.
- Wide cart design including product images (if available) and simple instant (AJAX) changing of quantity and deleting items, including support for standard coupons, and a much more simplified totals section than the default Commerce theme.
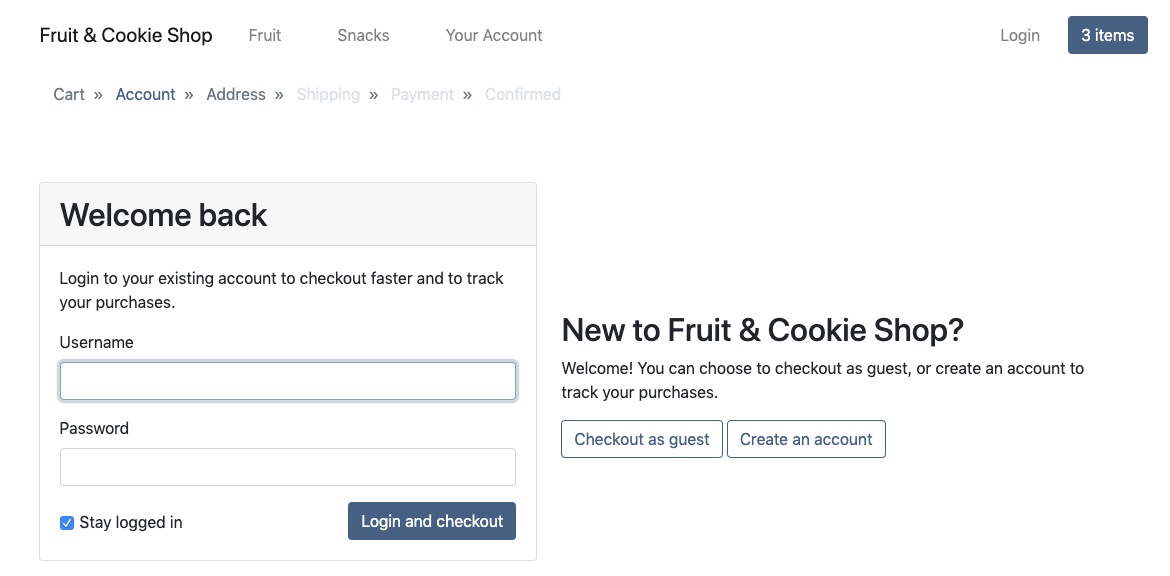
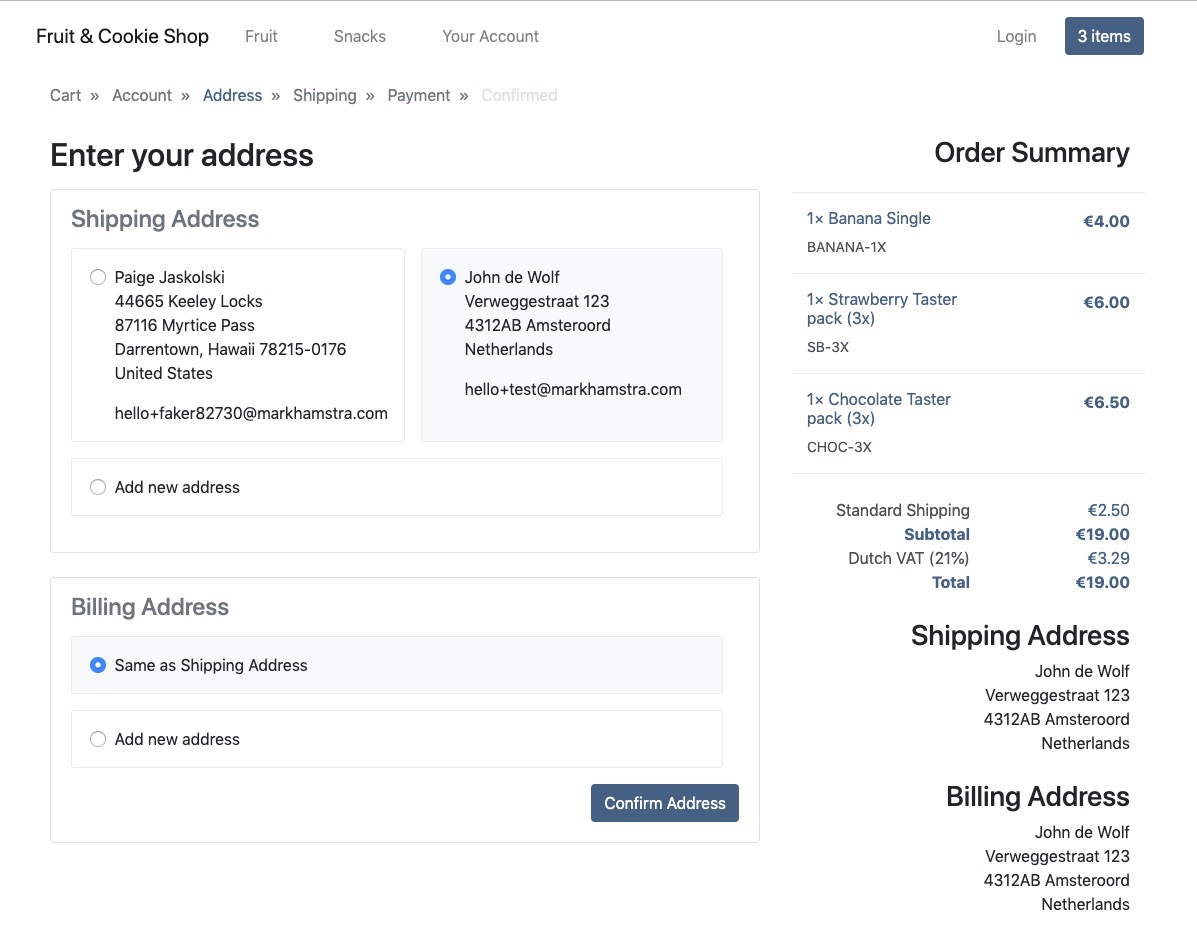
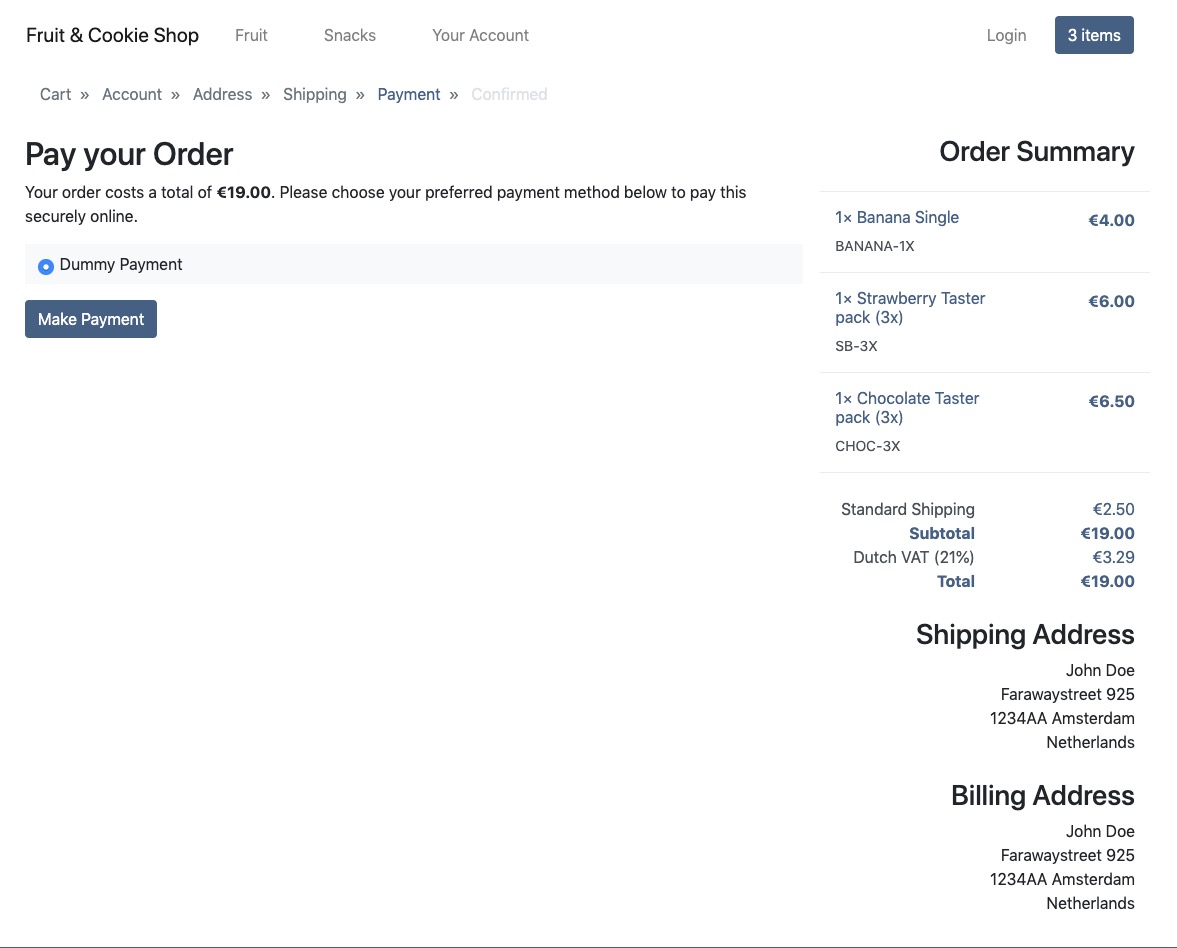
- Fully AJAX-enhanced checkout theme, including support for all standard Commerce checkout functionality (repeat visit address selection, on-site and redirect payment gateways, etc)
- Signup page for account registration, including email activation with the Login package
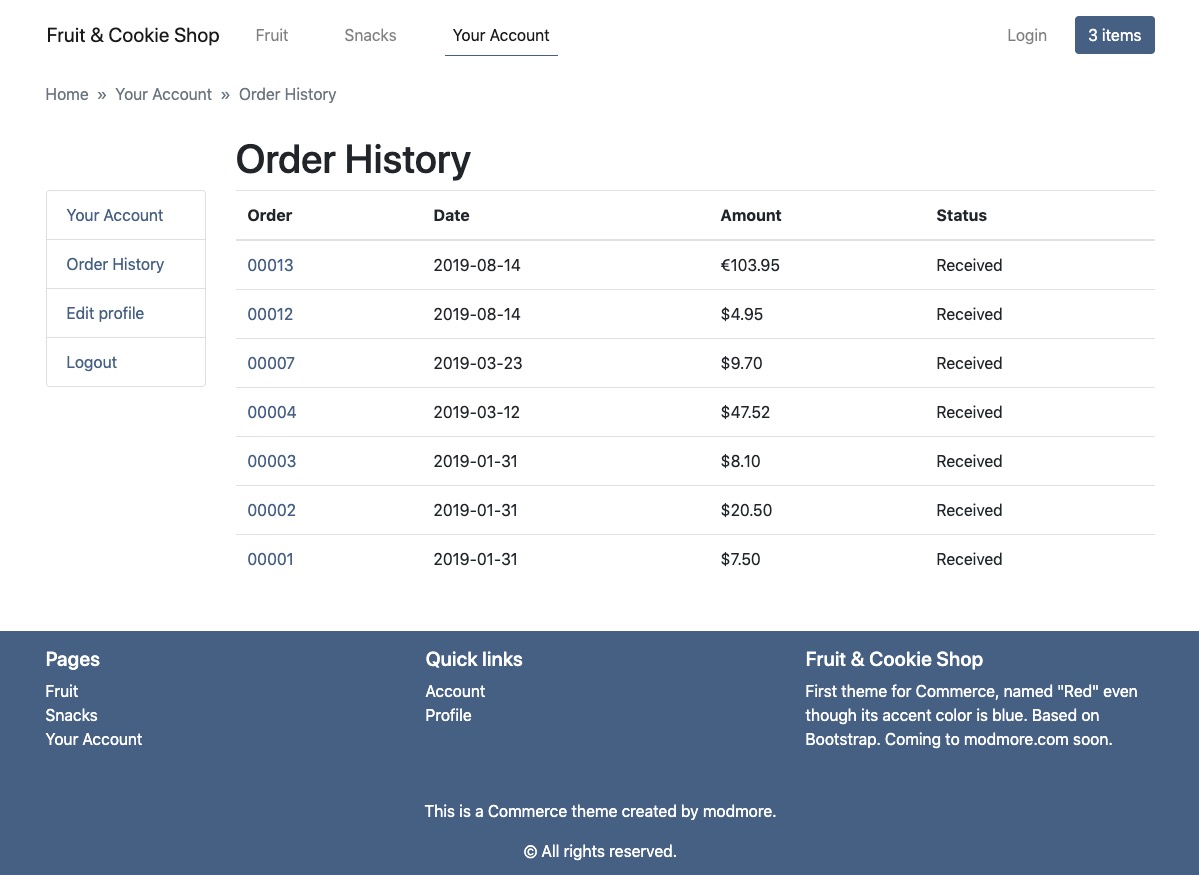
- "My Account" section offering:
- Login
- Commerce order history
- Basic profile editing
The goal has been to make everything easily customised. The markup has been kept as simple and easily to change as possible, adhering to standard MODX site building practices, so you can use the starter pack as a proper foundation for something completely custom.
Customise as you wish - while keeping an upgrade path
From time to time, we may incorporate new Commerce features or improvements in the starter pack. We may even make some tweaks to the design or add extra sections and templates.
When that happens, we want to make sure you can still upgrade the starter pack without risking your changes being overwritten.
For elements (templates and chunks), we store a hash of the original element content with the element when it is first created. That is checked when upgrading, and if the hash is different (meaning the content has changed), it is skipped. If you want to revert to the default template, you can do so just by checking it in during the installation.
For the Commerce Twig templates, use the multiple-theme-inheritance introduced in Commerce 1.1 to implement your own overrides. The theme name for the starter pack is "ctred".
We even have you covered for the CSS! The source Sass and build tools are included in assets/components/commercetheme_red/, along with a readme that explains how you can use the gulp build workflow and the source/dist files to create custom styling that persists across upgrades. If you want to reset to the default styles, the installer lets you do that too.
We'd love to see what you can create.
Please note: while standard support is available for Commerce which also covers official extensions, we do not offer design, styling, or implementation assistance, nor does support cover the third party extras that the starter pack uses. The starter pack is meant to serve only as an example for you to build upon. Of course we will gladly help you understand how different parts fit together with Commerce, just don't expect us to provided detailed instructions for how to add certain sections or CSS changes, for example. Standard MODX/web development skills are necessary to make the most of the starter pack, so contract a developer if you need assistance with that.
While we've done basic testing and set out to build you a solid foundation (90+ performance and accessibility scores in Lighthouse), we don't guarantee cross-browser compatibility or adherence to accessibility standards.
Installation & Getting Started
We recommend using the starter pack on a clean site, or at the very least a staging environment if you wish to incorporate it into an existing site. The starter pack will create a number of elements and resources, and adjust system settings to match, which may have some unintended side effects on an existing site.
The starter pack can be downloaded from the modmore package provider, like our other extras. It's called "CommerceTheme Red" (for historic reasons).
Make sure Commerce is installed first, and then install the starter pack. You'll see a lot of checkboxes in the setup options allowing you to choose exactly what should be installed.
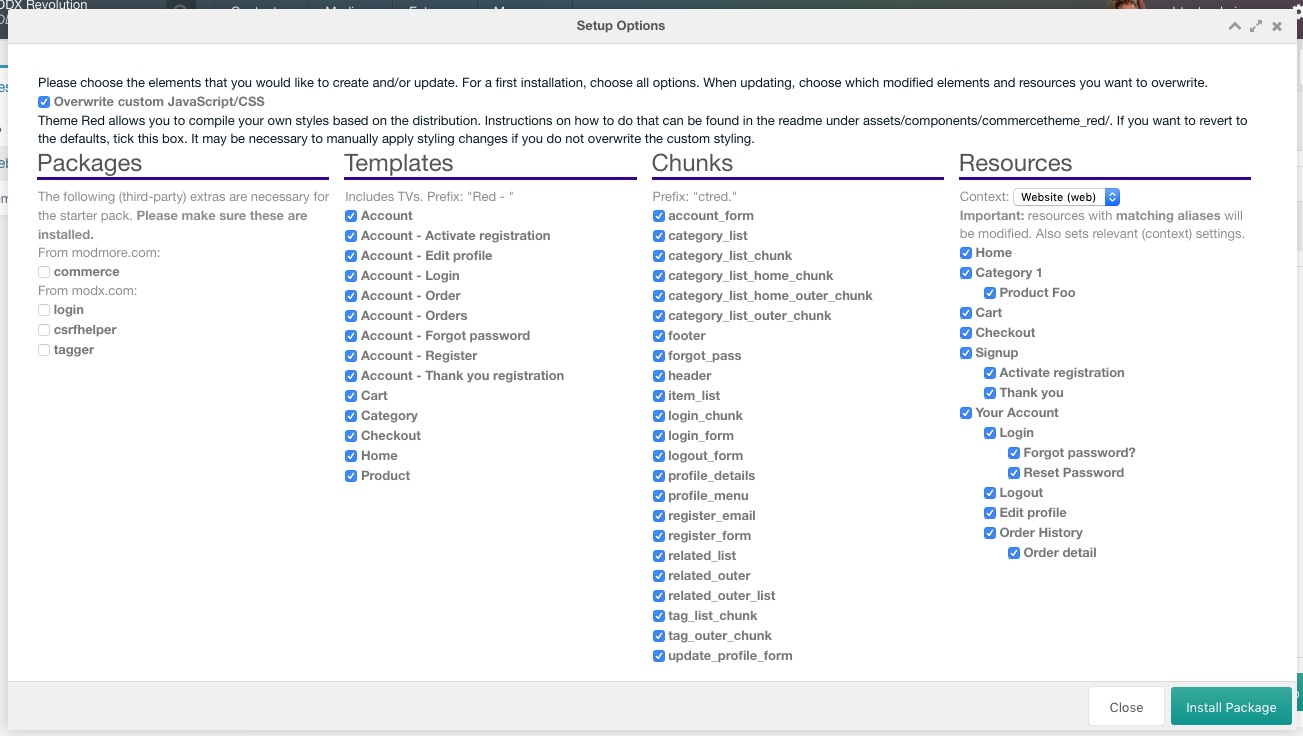
On a clean installation, you can keep all of these checked. On an existing site, you'll likely want to exclude already existing pages like the Home, Login, etc, and instead manually update those.
Also note the list of packages. All listed packages are required and need to be manually installed from the relevant package providers. At time of writing, you need: Commerce, pdoTools, Login, CSRFHelper, Tagger, and getRelated.
Now enable the theme:
- Edit the commerce.theme system setting to include "ctred". If you have a custom theme, add that first before ctred, for example:
custom, ctred, default. (In Commerce 1.0 or earlier, you can only use one theme. Upgrade to 1.1, or set it to "ctred".) - Add
{core_path}components/commercetheme_red/templates/to the commerce.themes_path system setting.
Now, with all packages and the starter pack installed and enabled, you'll notice a set of new resources and templates in your site. You can also browse it; though it will look a little empty.
Add some product information:
- Navigate to Category 1 > Product Foo and on the Template Variables tab add some products into the product matrix. This will fill up price information used on the category page and elsewhere.
- Note: the name you give to the Row and Column will be used for the select box on the product page; you can change those through the Manage Matrix Options button or change the defaults by editing the product_matrix template variable input options.
- To see product images, make sure to edit a product and to associate an image with it. Also add some stock, as the category pages only show prices for products that are in stock.
- You can create additional categories and products. Use the "Red - Category" and "Red - Product" templates respectively.
To enable Tagger for additional categorisation:
- Navigate to Extras > Tagger.
- On the Groups tab add a new group with name "Product Category" and alias "category". We suggest setting "Place" to "In TVs section" or "Above Content", setting "Field type" to "Tag field", and enabling "Remove unused tags", "Allow new tags from field", "Allow type" and "Show autotag" -- but you can configure Tagger as you'd like. Set "Show for Templates" to the ID of the "Red - Product" template, which is usually 15 on a clean installation.
- Navigate to a product page (e.g. Category 1 > Product Foo) and enter a category in the new field that now appears for the category.
- You'll now see the category field on a category page, with filtering enabled.
Let's look at the homepage:
- You can choose a hero image to use as a background in the top section and add some text through the template variables.
- Any content added to the homepage is inserted after the hero section, but before the featured products and categories.
- To select featured products, edit a product resource, and set the "Featured product" template variable to "true".
- Category listing is automatic based on the category template. To make it prettier, you can add an image to the "Category image" template variable when editing a category, and fill in a short description in the "Description" field, on the Document tab.
- To make sure the homepage of the starter pack is used, you may need to change the site_start system setting to the ID of the created homepage (on a clean installation, usually ID 4). If you see a "Home" link in the navigation, that's likely your old homepage which is marked to show in menus.
But, there's more! Let's look at the system settings.
Go to System > System Settings and select "commercetheme_red" in the namespace dropdown.
- Use the various settings in the Footer section to change the content in the footer. That includes the copyright notice and the short blob of text on the right of the footer, plus the quick links. To make it easier for the client to manage these, you could use ClientConfig and give the settings in ClientConfig the same key as shown in the system settings grid.
- The "Resources" and "Templates" sections will have been automatically filled on installation, referencing the various templates and special resources. These are used in templates and to provide cross-links automatically. If you're retrofitting the Red templates to an existing site, you may need to change these settings.
Now that you have the basic setup working and filled with some high-level content, you can start customising things.
Browse the available templates and chunks, and to learn more about theming the cart and checkout start here. The templates belonging to Red are in core/components/commercetheme_red/templates/ctred/, but you should set up a custom theme and theme path for any overrides to make sure they are safe from upgrades.
Release History
CommerceTheme Red 1.1.1-pl
Released on 2022-11-30
Released on 2022-12-01
- Replace {% spaceless %} with {% apply spaceless %} for Commerce 1.3 compatibility
CommerceTheme Red 1.1.0-pl
Released on 2022-09-09
- Add lexicons for system setting name and descriptions [#4]
- Replace kitten image placeholders with placeholder.com image placeholders [#2]
- Fix reset password not working. Added new reset password template with snippet call for the resource to use. [#6]
- Fix registration not redirecting on submit. Add new resource, template and setting. [#5]
- Add new template for product list TV [#8]
- Make sure resources with both TV types can be displayed in related, featured, other listings.
- Update product_tab_show and featured_product TVs to be checkboxes (added input options to the installer)
- Added rank values to the TVs so they are in a reasonable order when installed
- Updated footer to show current year
- Removed Product Foo and replaced it with Product Matrix and Product List resources
- Updated main.js to handle variation changes and adding to cart for new Product List template
- Remove unused property in get_cart call in header chunk [S23031]
- Fix issue confirming registrations in default activate registration template [S23978]
CommerceTheme Red 1.0.2-pl
Released on 2019-12-03
- Remove the non-functional Wishlish button (also resolves issue creating related_list and category_list chunks on non-UTF8 databases)
CommerceTheme Red 1.0.1-pl
Released on 2019-12-02
- In Product template, add hideContainers to the getRelated call to not show category resources in the list.
- Add some bottom margin to the login-or-signup blocks in the checkout
- Use proper Bootstrap invalid form classes in address step of checkout
- Align addresses right in the checkout, with a bit more margin
- List pdoTools and getRelated as required packages in the installer
- Make sure ctred.assets_url setting is created on installation
- Make it easier to change the default image for a product in the template, and make sure it uses the first available image as default
- Add password_reset_page_id setting to the right category (on first install)
CommerceTheme Red 1.0.0-pl
Released on 2019-11-27
- Official 1.0 release.
CommerceTheme Red 1.0.0-rc3
Released on 2019-08-15
- Some more minor gateway-related styling tweaks for Commerce v1.1.
CommerceTheme Red 1.0.0-rc2
Released on 2019-08-14
- Include some new styles for updated gateways in Commerce v1.1 and upcoming MyParcel extension
- Add cursor: pointer to the minicart toggle button
CommerceTheme Red 1.0.0-rc1
Released on 2019-05-21
- First packaged release
- Read more:
- Splitit Payment Gateway
- Spraypay Payment Gateway
- Starter Pack "Red"
- Starter Pack "Blue"
- Store Pickup